Setup Database in Cloud SQL
Next, we need to set up the database to ensure all the necessary data is populated for our application. We will do this by importing a pre-configured SQL file into our Cloud SQL instance.
Step 1: Navigate to Cloud SQL
-
Navigate to the Cloud SQL instances page by searching for "Cloud SQL" in the top search bar or by using this direct link: https://console.cloud.google.com/sql/instances
-
You should see that a Cloud SQL instance has already been provisioned for you.

Step 2: Import the Database
-
Click on the Instance ID to open the instance details page.
-
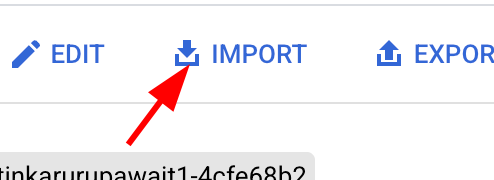
At the top of the page, click the IMPORT button.
-
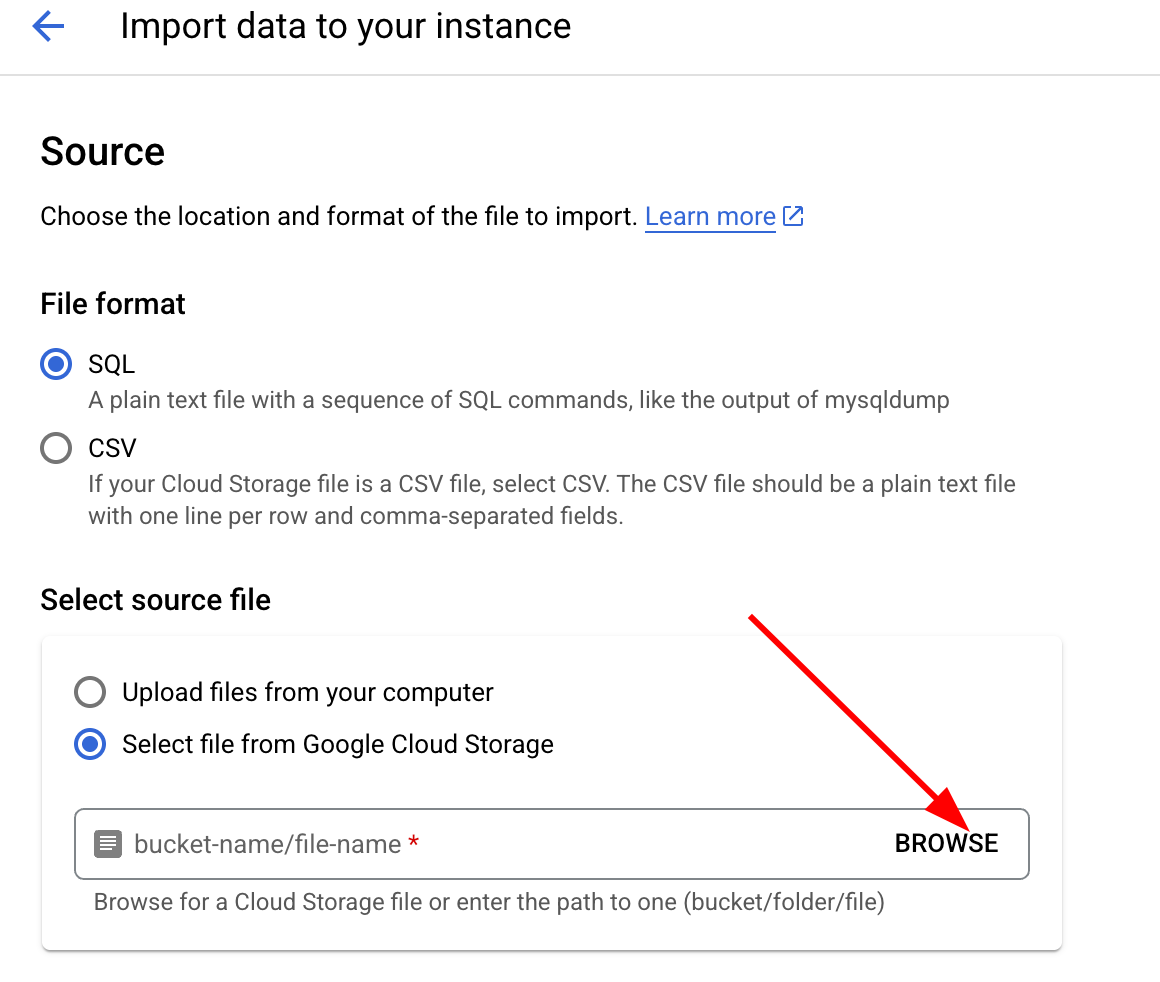
On the "Import data" screen, under the Select source file section, click BROWSE.
-
A popup window will appear showing your Cloud Storage buckets. Double-click on the bucket name that ends with
-cloud-mastery.
-
Select the
cloud_mastery.sqlfile and click the SELECT button at the bottom.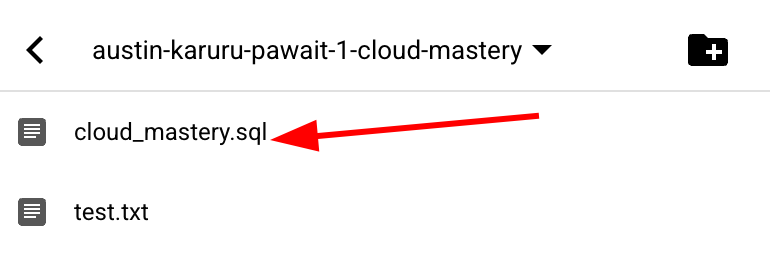
-
Finally, under the Destination section, expand the Database dropdown and select
cloud_mastery.
-
Click the IMPORT button to start the process. The import will begin, and you will be returned to the instance details page.
Next Steps
Database setup is complete! You can now proceed to the next step, where we will prepare our GitHub environment.