Setup Cloud Build for the Frontend
We will now create the final CI/CD pipeline for our frontend application. This process is very similar to the backend setup but requires different environment variables for the application to connect to the backend API.
Step 1: Create the Frontend Trigger
- Navigate back to Cloud Build > Triggers in the Google Cloud console.
- Click Create trigger.
Step 2: Configure the Trigger
- Name:
cloud-mastery-frontend-deploy - Region:
us-central1 (Iowa) - Source:
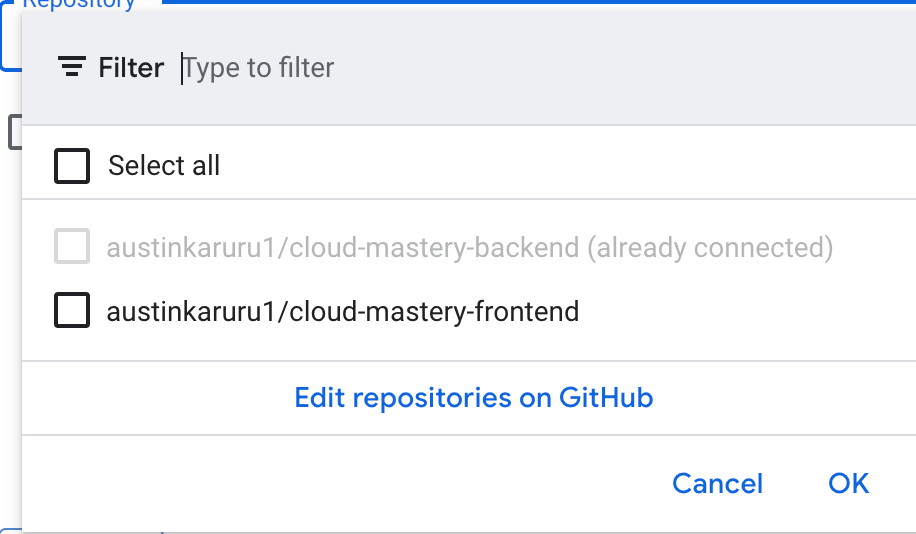
- Repository: Select your forked
austinkaruru1/cloud-mastery-frontendrepository from the dropdown. It should already be available since we connected your GitHub account.
- Repository: Select your forked
- Branch: Enter
^master$ - Configuration:
- Type:
Cloud Build configuration file (yaml or json) - Location:
/cloudbuild.yaml(default)
- Type:
-
Advanced: Substitution Variables:
- This time, we need to add two variables. Click Add variable twice.
Important: Backend URL Needed
One of the variables requires the URL of the
cloud-mastery-backendservice you deployed in a previous step.- Variable 1:
- Variable:
_NEXT_PUBLIC_APP_NAME - Value:
CLOUD MASTERY TRAINING
- Variable:
- Variable 2:
- Variable:
_NEXT_PUBLIC_API_URL - Value: To get this value, open a new tab and go to the Cloud Run console. Click on your
cloud-mastery-backendservice and copy its URL.
- Paste the URL into the value field and append
/api/v1to the end. It should look like this: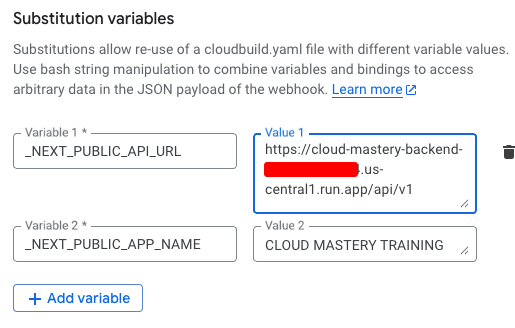
- Variable:
-
Service Account: Select the
terraform-service account, just as you did for the backend. -
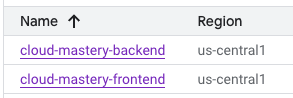
Click Create. Your Cloud Build Triggers list should now show both the backend and frontend triggers.
Next Steps
Frontend pipeline is configured! In the final step, we will run this trigger and access our fully deployed application.