Create a Google Cloud VM Instance
With your custom image ready and your VPC configured, it's time to create the new virtual machine that will run your migrated application.
Step 1: Create a New Instance
- In the Google Cloud Console, navigate to Compute Engine > VM instances.
- Click the [+] CREATE INSTANCE button at the top of the page.
Step 2: Configure the VM Instance
Fill out the configuration details for your new VM.
-
Name:
pawait-vm-gcp-final(or another descriptive name). -
Region and Zone:
- Region:
us-central1(Choose the same region as your VPC). - Zone: Select any zone within that region, for example,
us-central1-c.
- Region:
-
Machine configuration:
- Series:
E2 - Machine type:
e2-medium(2 vCPU, 4 GB memory).
- Series:
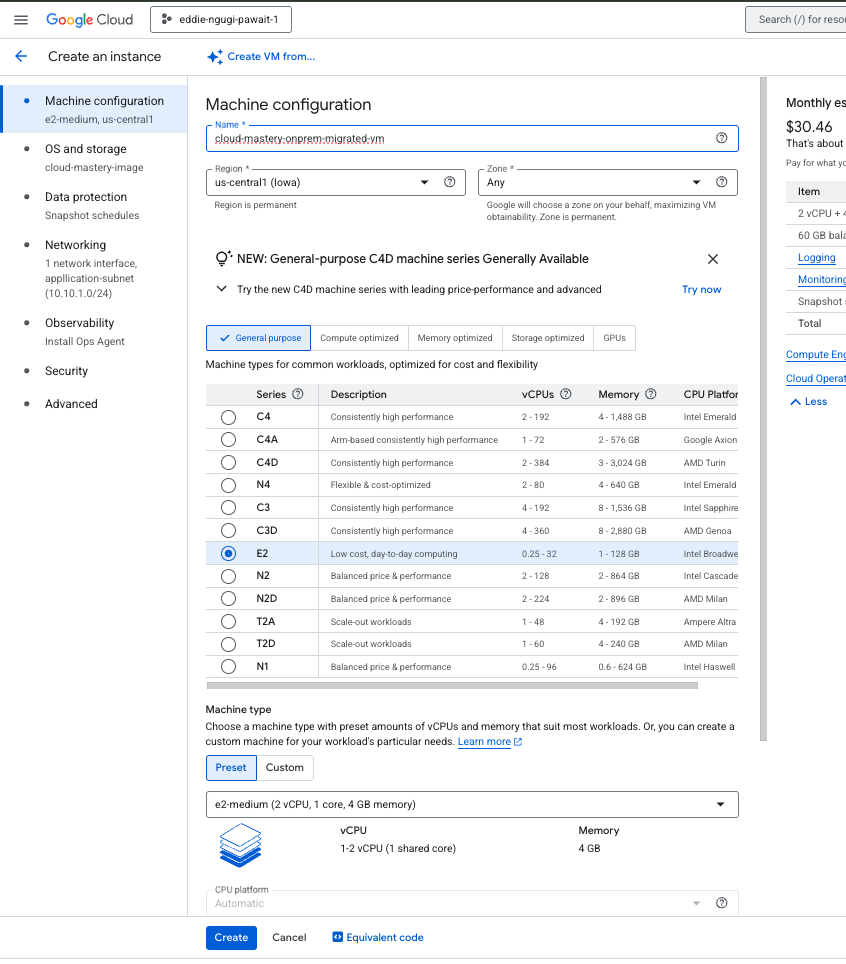
Tip
Try to select a machine type that closely matches the CPU and RAM of your original on-prem VM. You can always resize it later.
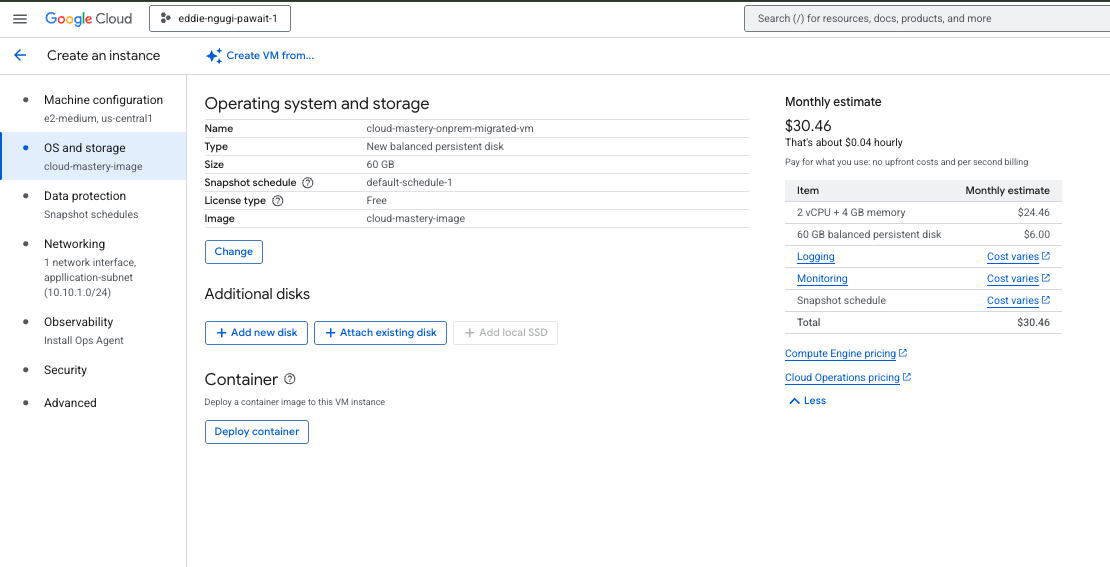
Configure the Boot Disk
This is the most critical part of the configuration. You will tell GCP to use the custom image you created in the previous phase.
- In the Boot disk section, click the CHANGE button.
- A new panel will open. Click on the CUSTOM IMAGES tab.
- From the Image dropdown list, select the image you just created:
cloud-mastery-image. - The Boot disk type and Size (GB) will default based on the image. You can increase the size if needed.
- Click Select.

Configure Networking and Firewall
- Expand the Advanced options section.
- Click on Networking.
- Under Network interfaces, ensure the following is selected:
- Network:
my-cloud-mastery-vpc - Subnetwork:
application-subnet
- Network:
- Under Firewall, check the boxes for:
Allow HTTP trafficAllow HTTPS traffic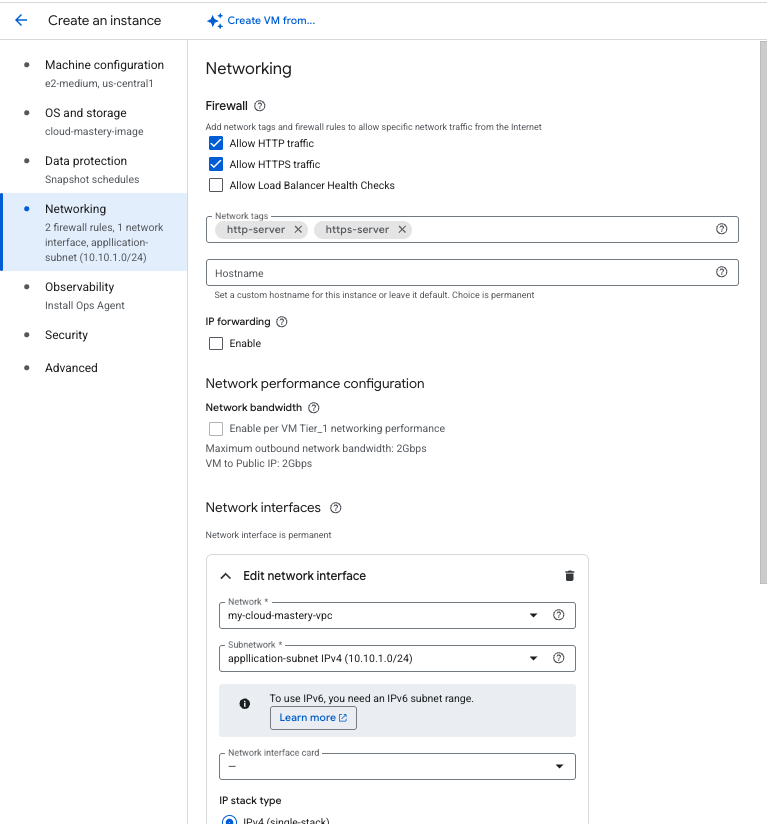
- Review all the settings and click the CREATE button at the bottom of the page.
VM Instance Created
Your new virtual machine will now be provisioned and started. Once it's running, you will see a green checkmark next to its name in the VM instances list, and it will have both an Internal and an External IP address.

What's Next
Your migrated VM is now running in the cloud! The next step is to access it, restart the necessary services, and verify that your application is working correctly.