Install Google Cloud CLI and Authenticate
In this phase, we'll install the Google Cloud CLI on your server and authenticate it to access your Google Cloud resources.
Step 1: Install Google Cloud CLI
Google Cloud CLI needs to be installed on the server. Follow the installation process based on your operating system.
For Ubuntu/Debian Systems
# Add the Cloud SDK distribution URI as a package source
echo "deb [signed-by=/usr/share/keyrings/cloud.google.gpg] https://packages.cloud.google.com/apt cloud-sdk main" | sudo tee -a /etc/apt/sources.list.d/google-cloud-sdk.list

# Import the Google Cloud Platform public key
curl https://packages.cloud.google.com/apt/doc/apt-key.gpg | sudo apt-key --keyring /usr/share/keyrings/cloud.google.gpg add -

# Update the package list and install the Cloud SDK
sudo apt-get update && sudo apt-get install google-cloud-cli
Alternative Installation Methods
For other installation methods, refer to the official documentation: How to install the Google Cloud CLI
Step 2: Initialize and Authenticate Google Cloud CLI
Run gcloud init to get started:

Authentication Process
- Choose Configuration: Select option
[1] Re-initialize this configuration [default] with new settings -
Login: You'll be prompted to log in. Choose
Yto continue with login
-
Browser Authentication
A URL will be provided for authentication
Copy and paste the URL into your web browser
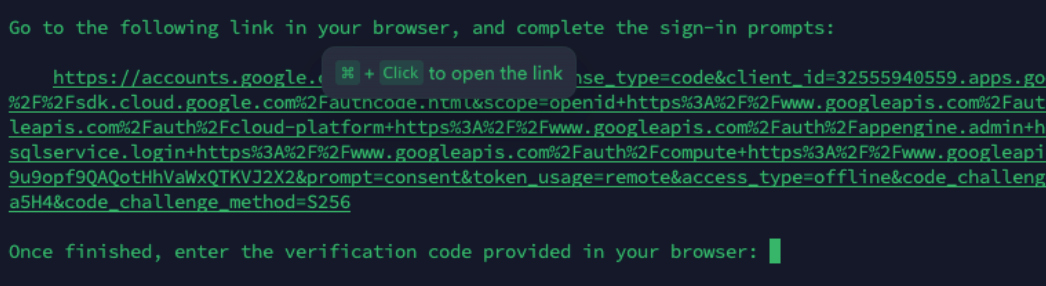
Log in with your Google Cloud account
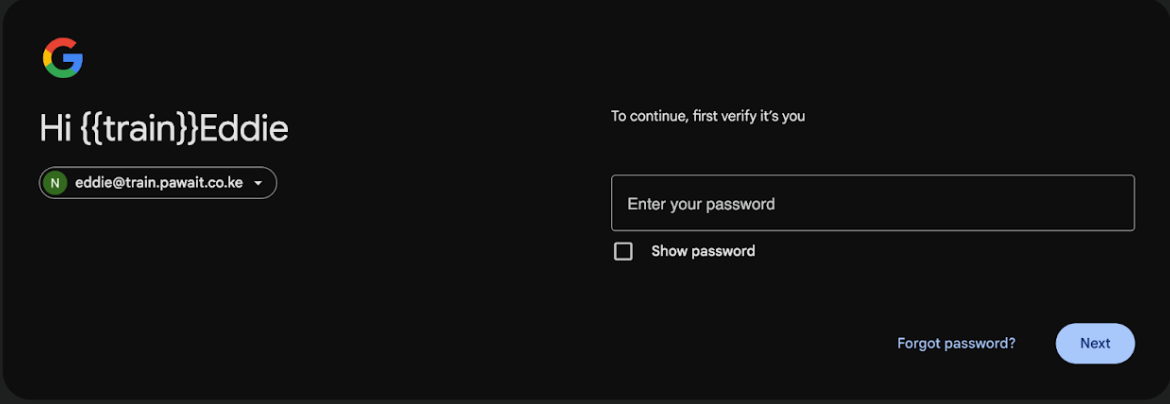
Grant the necessary permissions
 Copy the verification code from the browser
 Enter Verification Code: Paste the verification code back in your terminal
 If successful, you will see a message letting you know which user you have signed in as
 Select Project: Choose the Google Cloud project where you want to perform the migration


Default Region/Zone: Configure your default compute region and zone (recommended: choose the same region where you created your storage bucket) You can also do this by running this command:
Tip
Replace zone-name with the us-central1-a
Verification
After completing the authentication process, verify your setup:
# Check your active account
gcloud auth list

# Check your active project
gcloud config list project

# Test access to your storage bucket
gsutil ls gs://your-bucket-name
Authentication Complete
You should see confirmation that you are signed in and your project is selected. You're now ready to upload files to Google Cloud Storage.
Troubleshooting
Common Issues
Issue: "gcloud: command not found" Solution: Restart your terminal or source your shell profile:
Issue: Authentication timeout
Solution: Ensure you complete the browser authentication within the time limit. If it expires, run gcloud auth login to retry.
Issue: Permission denied errors Solution: Make sure your Google Cloud account has the necessary permissions for the project.